
Quick Answer:
You can record your screen on a Mac with built-in tools like Shift + Command + 5, QuickTime, or third-party apps, but Visla is the easiest way to go from rough screen capture to a polished, share-ready video. Record your screen once in Visla, then let AI polished screen recording clean up your narration, add subtitles, split everything into scenes, and give you a simple editor for quick tweaks. For client-facing demos, training, and async updates, Visla combines screen recording + AI editing + sharing in one workflow, so you spend less time re-recording and more time shipping clear videos.
Best overall: Screen record on Mac with Visla
If you want more than a basic capture, Visla lets you record your screen and then automatically polish the video with AI: cleaned-up narration, scene-based editing, subtitles, and easy exporting. Visla has an AI-powered screen recorder for Mac that turns raw screen captures into clear, narrated, subtitle-ready videos with minimal editing.
| Tool type | Editing & AI | Best for |
|---|---|---|
| macOS Screenshot / QuickTime | Very basic | One-off captures, no polish |
| Async tools (Loom, Zight) | Light | Quick async updates |
| Creator tools (OBS, ScreenFlow) | Advanced | Long tutorials, complex layouts |
| Productivity suites (CleanShot X…) | Basic+ | Docs + screenshots + light editing |
| Visla | AI-driven | Polished, clear, share-ready videos fast |
Option 1: Use the built in Screenshot toolbar (Shift + Command + 5)
For quick recordings, macOS gives you a built in screen recorder through the Screenshot app.
How to record your screen with Shift + Command + 5
- Press Shift + Command + 5 on your keyboard.
- When the Screenshot toolbar appears, select either Record Entire Screen, Record Selected Window, or Record Selected Portion.
- Click Options to choose:
- Save location
- Microphone input
- Whether to show mouse clicks
- A short countdown timer
- Capture format (HDR or SDR, if applicable)
- Click Record to start.
- When you finish, click the small Stop button in the menu bar.
Your Mac saves the recording as a video file that you can open in QuickTime Player to trim and export.
When this method works well
- You need a fast, one off recording.
- You do not need editing or annotations.
- You only plan to share the file by email, chat, or upload.
Where it falls short
- No automatic subtitles.
- Limited editing and no stock visuals.
- No built in sharing links or collaboration.
Option 2: Record with QuickTime Player
QuickTime Player also gives you a simple way to screen record on a Mac. It uses the same Screenshot controls behind the scenes, but opens your recording directly in QuickTime.
How to record your screen with QuickTime Player
- Open QuickTime Player.
- In the menu bar, choose File > New Screen Recording.
- Use the Screenshot toolbar to select what you want to capture and which microphone you want to use.
- Click Record and walk through your demo.
- When you stop, QuickTime opens the video so you can trim and save.
Best for
- Simple walkthroughs with light trimming.
- People who already use QuickTime for other media.
Limitations
- Few editing tools beyond trimming.
- No AI features, subtitles, or templates.
Option 3: Async video messaging tools (Loom, Zight, and similar)
If you send a lot of quick updates or feedback videos, async tools like Loom or Zight can feel very natural. They focus on fast recording and instant sharing links.
What these tools usually offer
- Screen, camera, and microphone recording in one place.
- Cloud hosting with shareable links.
- Light editing, such as trimming and stitching clips.
- Basic annotation and callouts.
Pros
- Very easy for quick async communication.
- Automatic upload and link sharing.
- Good for short messages and status updates.
Cons
- You still need a strong live take, since the tool captures your real time performance.
- Editing often stays basic.
- You do not always get full control over the final look and feel.
Option 4: Creator tools for long form recording (OBS Studio, ScreenFlow)
If you create full length tutorials or want studio style control, you can use creator tools such as OBS Studio or ScreenFlow.
Typical features in this category
- Multiple scenes with different screen layouts.
- Capture from several sources at once, such as display, browser window, and webcam.
- Audio mixing across system sound, mic, and music.
- Timeline editing with callouts, zooms, and transitions.
These tools give you a lot of power, but they also assume you want to spend time in a more complex editor.
Good use cases
- You create long training programs or YouTube content.
- You want a broadcast style layout with overlays and multiple cameras.
Trade offs
- Steeper learning curve.
- Heavier editing process.
- Harder to use for quick daily communication.
Option 5: Productivity capture suites (CleanShot X, Snagit)
Productivity capture tools combine screenshots, screen recording, editing, and sharing inside one app. CleanShot X and Snagit are classic examples on Mac.
What they tend to include
- Multiple screenshot modes and scrolling capture.
- Screen recording with audio and basic controls.
- Built in annotation tools for arrows, highlights, and blur.
- Simple editors to trim clips, resize, and reduce file size.
Where they shine
- Everyday documentation for support, product, and training teams.
- Clear visual tutorials with callouts and highlights.
- Workflows where you constantly switch between still images and video.
Where they still need help
- Narration and on camera performance still rely on you.
- You still have to write or speak a clean script.
- You often move your project to another tool for final polish.
Option 6: Screen record on a Mac with Visla
Now let’s talk about Visla. Visla gives you a flexible screen recorder plus an AI powered way to clean up your recording without a heavy edit.
You can think about Visla in two layers:
- Standard screen recording.
- AI polished screen recording.
Standard Visla screen recording
Visla’s desktop app lets you record your screen the way you already expect, but with a few helpful upgrades.
How standard screen recording works in Visla
- Download and install the Visla desktop app for macOS.
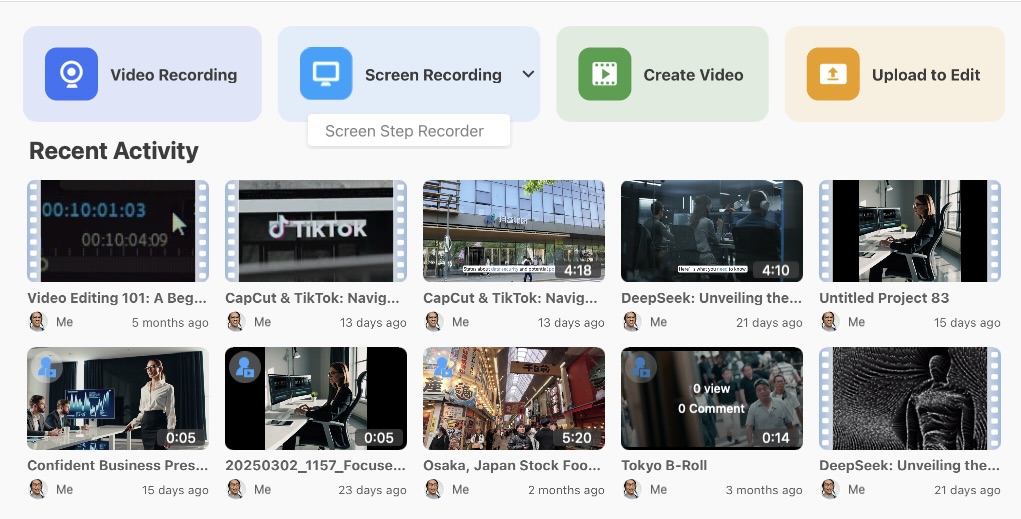
- Open the app and click Screen Recording.
- Choose what to capture:
- A specific window
- A custom region
- Your full screen
- Select your audio sources and camera, if you want a picture in picture recording.
- Start recording and walk through your content.
- When you stop, Visla saves the recording to your workspace so you can edit it or drop it into a larger video project.
Standard screen recording works well when you want a familiar workflow but still want access to Visla features such as zoom and pan, stock media, and transcript based editing.
AI polished screen recording: record once, let AI refine it
AI polished screen recording adds an extra layer of help on top of that standard flow. You still record like normal, but Visla takes over once you finish.
The way it works is very simple. You start off by recording your screen like normal. When you stop, Visla cleans up what you said, rewrites it into clear, simple narration, and replaces the original audio with a natural sounding voice. It also splits your footage into logical scenes that match what you showed, and adds subtitles. You land in the scene based editor to make quick tweaks, swap scenes, or trim anything before you share.
Step by step: how AI polished screen recording works
- Download the app
Install the Visla desktop app on your Mac. You use the app for screen recording. - Start a screen recording
Click Screen Recording, then choose what to capture: a window, a region, or your full screen. Before you start, select AI polished screen recording so Visla knows to handle cleanup and subtitles. - Instruct the AI
After you stop, add a sentence or two that describes your recording. This short prompt gives Visla context so the AI can handle your screen recording with more accuracy. - Edit your polished recording
Visla opens your video in the scene based editor. You can trim, reorder scenes, adjust text and graphics, and export the final version in the format you need.
Why Visla feels different from other Mac screen recorders
Most screen recording tools ask you to get everything right in one live take. If you hesitate, lose your place, or miss a step, you record again or spend more time editing.
Visla flips that experience. You record once, then let AI clean up the narration, structure the video into scenes, and add subtitles for you. You still stay in control of the final result, but you save time and avoid marathon retakes.
If you only need a quick one off clip, the built in tools on your Mac will probably do the job. When you care about polish, clarity, and speed, especially for client facing or training content, screen recording with Visla often gives you a smoother path from idea to finished video.
FAQ
To screen record with built in tools, press Shift + Command + 5 to open the Screenshot toolbar. Choose whether you want to record the entire screen or a selected portion, then click Record. When you finish, click the small Stop button in the menu bar to end the capture. Your Mac saves the recording as a video file that you can open or share.
Start by pressing Shift + Command + 5 and opening the Screenshot toolbar. Click Options and choose your microphone under the audio section so macOS captures your voice while it records your screen. Then select your recording area and click Record to start. When you stop, the video will include your screen and your spoken narration.
If you use the Screenshot toolbar, screen recordings typically save to your Desktop with a name that starts with “Screen Recording” plus the date and time. You can change this location by pressing Shift + Command + 5, clicking Options, and selecting a different folder under Save to. Picking a dedicated folder keeps your desktop cleaner and makes files easier to find later. You can also drag finished recordings into cloud storage or project folders once you are done editing.
Start by being clear about what you need from your recordings, such as quick clips, detailed tutorials, or polished client facing videos. Built in tools work well for one off captures, while async messaging apps and creator tools help with longer or more complex content. Consider whether you want basic recording only or a full workflow that includes editing, subtitles, and easy sharing. In many professional settings, a screen recorder that pairs capture with AI assisted editing and clear narration can save you the most time over the long run.
To capture your voice while you screen record on a Mac, you select a microphone in the Screenshot toolbar or QuickTime screen recording options. If you need to record system audio, you usually need an additional app or virtual audio device. Many third party tools bundle microphone and system audio capture together so you do not have to manually route sound. Visla makes it simple by letting you select your sources, then it can clean and re voice your narration automatically with AI polished screen recording.
May Horiuchi
May is a Content Specialist and AI Expert for Visla. She is an in-house expert on anything Visla and loves testing out different AI tools to figure out which ones are actually helpful and useful for content creators, businesses, and organizations.