

Quick Answer: How to add transitions to your video in Visla
Visla’s Scene-Based Video Editor lets you add and customize 50+ video transitions (fades, wipes, zooms, glitches, and more) to smooth your cuts and polish your story. For most videos, use simple cuts and short fades as your default, and save flashy transitions for big scene or topic changes.
Video transitions are the glue between your scenes. In Visla’s Scene-Based Video Editor, you can choose from 50+ transitions (from simple fades to bold glitches) to smooth out cuts, highlight big moments, and keep viewers watching. In this guide, you’ll learn what transitions do, when to use them, and exactly how to add them to your Visla projects.
How to add transitions to your video in Visla (step-by-step)
Adding transitions to your video is very simple in Visla’s intuitive, straightforward interface. And, of course, don’t forget to sign up for an account (or sign in if you already have one) to follow along to this guide.
- Generate your video
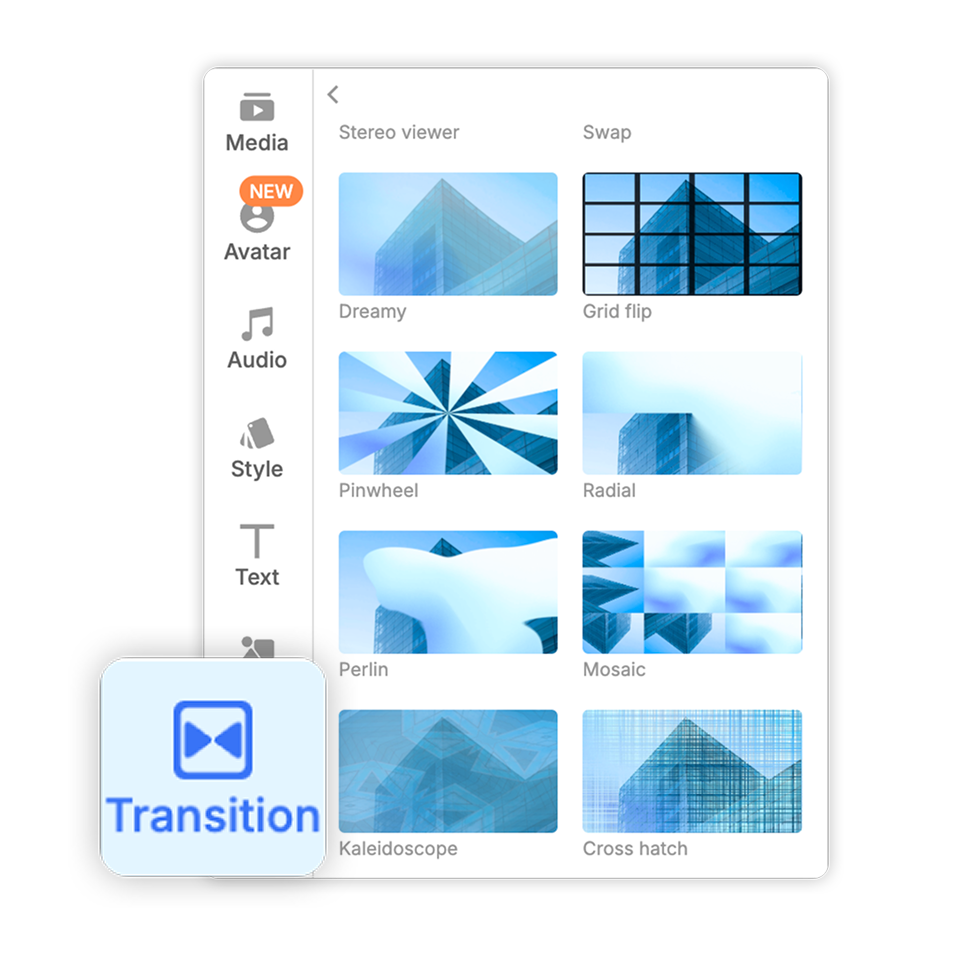
Create a new video project with Visla. After our AI is done creating your video, you’ll be taken to our Scene-Based Video Editor. - Add transitions
Open Transitions in the left panel. Drag your chosen effect between two clips to apply it instantly. - Customize your transitions
Adjust duration for a quick pop or a slow, cinematic move. Tweak direction or style where available so it fits the moment. - That’s it!
Preview the cut, fine-tune if needed, and keep building your story. Fast, simple, polished.
Why transitions matter in your Visla video projects
Though they may seem like simple effects, transitions can have a huge impact on the flow of your video projects. Here are some reasons to add them in:
- Guide the viewer through your story. Transitions signal a change in topic, location, or time so your audience never feels lost.
- Hide small jump cuts. A short fade or wipe can smooth over small gaps in footage and keep things feeling intentional instead of choppy.
- Make edits feel more polished. Subtle motion between scenes gives your video a professional rhythm, especially in corporate, training, and promo content.
- Re-engage viewers. A well-timed zoom, wipe, or glitch effect can reset attention during longer videos without distracting from your message.
However, you should always consider what types of transitions work best for the style of video you’re creating and when to actually add them in.
What kinds of transitions does Visla include?
Visla currently offers 50+ built-in transitions in the Scene-Based Video Editor, including:
- Essentials: Clean fades, zooms, and blurs for everyday cuts.
- Wipes & slides: Up, down, left, right, and directional wipes for clear shifts in time or place.
- Shapes & reveals: Circles, cubes, grids, and other geometric reveals for chapter breaks or title cards.
- Zooms, warps & morphs: Bolder motion for product reveals or dramatic moments.
- Glitch & distortion: Techy, energetic looks for intros and fast-paced edits.
- Creative blends: Blend modes that add a stylish layer between scenes.
Every transition works inside Visla’s Scene-Based Video Editor, so you can drag, preview, and tweak them without leaving your main editing workspace.
When to add transitions (and when to skip them)
Most professional editors treat a straight cut as their default and add visible transitions only when they have a clear reason, like a change in time, place, or idea. If you’re jumping from one chapter of your script to the next, moving between locations, or shifting from talking-head to B-roll, a transition in Visla’s Scene-Based Video Editor can signal that shift and keep viewers oriented. Transitions are also helpful for softening jumpy footage, hiding small continuity issues, or giving important moments, like a product reveal or key takeaway, a bit of extra emphasis. In those cases, a simple fade, dissolve, or short slide often does the job better than something loud and complex.
Skip transitions when two shots already feel naturally connected, such as different angles of the same moment or quick back-and-forth dialogue. Over-decorating every cut with an effect can make your video feel busy or amateur, especially in explainers, training videos, or presentations. A good rule of thumb is to rely on clean cuts for most edits, then pick just a few “signature” transitions from Visla’s 50+ options and reuse them consistently for scene changes and major beats. If you notice the transition more than the story, it’s a sign to dial things back or switch to something simpler.
FAQ
Video transitions in Visla are visual effects that smooth the change from one scene or clip to the next. In the Scene-Based Video Editor, you can drag these transitions between scenes to hide small jump cuts and guide viewers through your story. Used well, they make AI-generated and recorded footage feel more polished, professional, and easier to follow. You should add transitions when the topic, time, or location changes so that the viewer clearly understands the shift without being distracted.
To add transitions in Visla, first generate or open your video so it loads in the Scene-Based Video Editor. Open the Transitions panel on the left, then drag your chosen effect between two scenes in the timeline. Click the transition to adjust duration, direction, or style so it matches the pacing and mood of that moment. Play back the cut to preview the change, and keep tweaking or swapping transitions until the flow feels smooth and natural.
Visla currently includes 50+ built-in video transitions you can use directly inside the Scene-Based Video Editor. These range from simple fades and cross dissolves to wipes, slides, zooms, shape reveals, and glitch-style effects. Because everything is drag-and-drop, you can quickly test different styles between the same two clips until you find the one that fits. This variety makes it easy to keep your brand’s videos consistent while still having enough creative options for intros, chapter breaks, and big reveals.
For fast-paced social clips, aim for short transitions in the range of about 0.3 to 0.7 seconds so the edit feels snappy. For training, explainer, and presentation-style videos, slightly longer transitions around 0.5 to 1 second can give viewers time to process a shift in topic or slide. In Visla, you can fine-tune this by selecting the transition and adjusting the duration slider until the timing matches your voiceover and on-screen motion. As a rule of thumb, if viewers notice the transition more than the content itself, it is probably too long or too flashy for that context.
Yes, you can add, change, or remove transitions in Visla even after the AI has finished generating your video. Once you are in the Scene-Based Video Editor, simply click any existing transition between scenes to adjust its style or duration, or press delete to remove it. You can also drag a new transition from the Transitions panel onto the same cut to instantly swap the effect. This flexibility lets you experiment freely with different looks until the pacing and energy of your video match your goals and audience.
May Horiuchi
May is a Content Specialist and AI Expert for Visla. She is an in-house expert on anything Visla and loves testing out different AI tools to figure out which ones are actually helpful and useful for content creators, businesses, and organizations.