
Quick Answer
AI Director Mode helps you generate AI video clips that actually fit together by making you plan first, then animate with intention. Start with your project basics and storyboard, because your best results come from getting structure, style, and reusable ingredients (characters, objects, environments) locked before you spend credits on AI video clips. Then pick the right AI video generation method for each scene: Text to Video for fast exploration, Frame to Video for precise start and end beats, and Ingredient to Video for composed, branded shots.
Why AI clip generation needs a plan
If you’ve tried AI video generation anywhere, you’ve probably seen the same pattern: one clip looks great, the next one looks unrelated, and suddenly you don’t have a video, you have a folder.
AI Director Mode pushes you toward a storyboard-first workflow so your AI video clips share the same world, the same characters, and the same intent. That matters for business video, because your audience doesn’t grade you on “coolness,” they grade you on clarity.
Here’s the mental model: the storyboard is your script and shot list, and AI clip generation is production. When you treat it that way, you make fewer random clips and more usable scenes.
The basic AI Director Mode workflow you need before you generate clips
You can generate AI clips quickly, but you’ll get better motion with less rework if you do a light setup first.
If you want a more detailed guide, check out our in-depth How to Use AI Director Mode in Visla article.
1) Start a project with a real starting point
Create a new video project and bring in whatever you already have: an idea, a script, a webpage, a PDF/PPT, images, audio, or existing footage. You want something concrete so Visla can structure your story and scenes.
2) Set your video basics
Pick constraints that shape every clip you generate:
- Duration target (for your video project overall)
- Aspect ratio (landscape, portrait, square)
- Voiceover (which AI voice or cloned voice you want to use)
3) Choose a visual style that you can repeat
Style sets the rules for your look across scenes. Pick one you can stick with for the whole video, especially for short-form marketing.
Popular choices include photorealistic, cinematic, 3D render, infographic, flat vector, UGC/social, and stylized.
4) Add your reusable “ingredients”
These are the parts that keep AI video clips consistent.
- Characters: a presenter, a customer, a product manager, a mascot
- Objects: your logo, a product shot, an app screenshot, packaging
- Environments: your office set, a studio, a clean abstract background
Treat these like a small cast and a few sets. You don’t need a lot. You need the right recurring elements.
5) Generate and tighten your storyboard
Here, Visla will generate your storyboard. Each scene will feature an AI-generated image, rather than an AI video clip. You can review your video project at this step before you decide to move onto full AI video generation.
Before you move onto the next step, remember:
- You can have Visla generate AI video clips for all of your scenes automatically.
- You can manually generate AI video clips. Visla automatically writes prompts and chooses an AI video generation method for each scene. You can edit or completely re-write each prompt as well as change the AI video generation method.
Choose the right AI video generation method for each scene
Visla gives you three practical ways to generate an AI video clip in AI Director Mode. Each one solves a different problem, so you’ll get better results if you pick the method scene by scene.
Method 1: Text to Video
What it is: You generate a clip from a prompt only.
Use it when:
- You want fast exploration and lots of options
- You want an abstract or stylized moment (brand vibe, metaphor, mood)
- You don’t need strict starting and ending frames
Avoid it when: the scene needs a specific product angle, a logo lockup, or a precise transition.
Prompt template (copy/paste):
- Subject:
- Setting:
- Action:
- Camera:
Example prompt:
“A product manager in a bright modern office points to a dashboard on a laptop. The camera slowly pushes in. Clean cinematic lighting, calm and confident tone.
Micro-tip: If the output feels generic, add one concrete detail you can picture, like “glass-walled meeting room,” “soft daylight from the left,” or “laptop at a 30-degree angle.”
Method 2: Frame to Video
What it is: You set a start frame and an end frame, then generate the motion between them with the help of a prompt.
Use it when:
- You need a specific opening and closing beat
- You want tighter control over composition
- You want cleaner transitions between scenes (match the last frame to the next scene’s first frame)
Avoid it when: your start and end images clash in subject, camera angle, or lighting.
Frame pairing rule of thumb: keep start and end frames “reasonably related.” If you choose wildly different frames, the AI has to invent too much motion, and you’ll see weird warps.
Example prompts:
“The camera moves from a medium shot to a close-up while the presenter gestures to the projected screen. Maintain the same person, outfit, and office lighting.”

Worksheet: pick better start/end frames
- Same subject or same primary object
- Similar camera height and angle
- Similar lighting direction
- One clear change (gesture, camera push, object movement)
Method 3: Ingredient to Video
What it is: You generate a clip using multiple ingredients in the same shot, plus a prompt.
Use it when:
- You need a composed scene with specific elements
- You want product, logo, and environment together
- You want a consistent “set” your audience recognizes
Avoid it when: you’re tempted to cram everything into one shot.
Ingredient checklist (keep it lean):
- 1 character (optional)
- 1 primary object (usually your product or UI)
- 1 environment
- 0–1 supporting props (only if they help the story)
Example prompts:
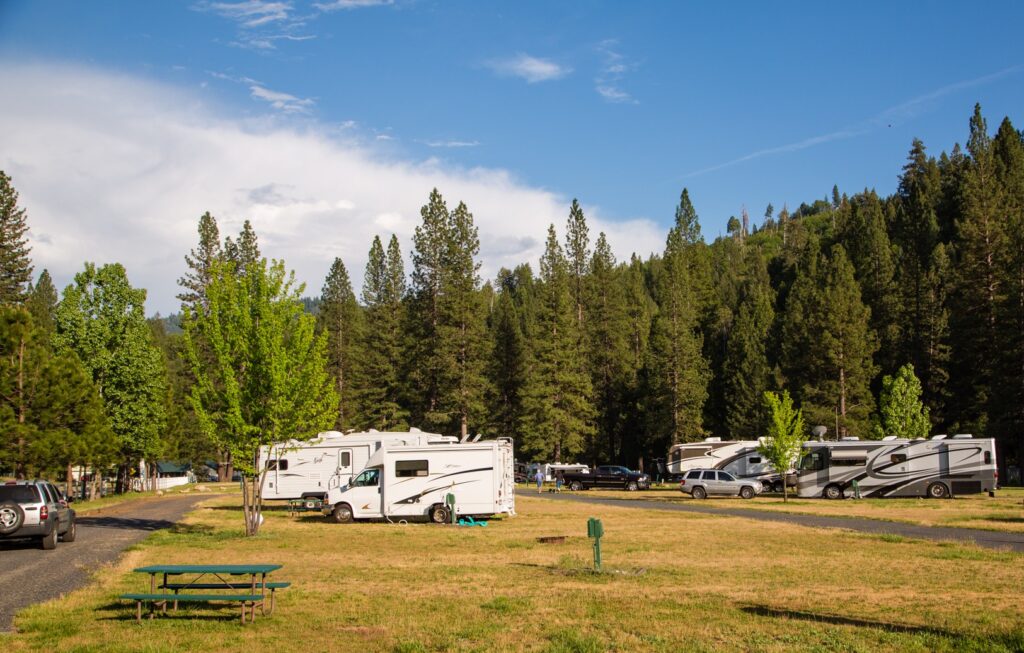
“A large RV drives from the road on the right into an RV park, then parks.”
A simple comparison table
| Method | Best for | What you control most | Common mistake | Fast fix |
|---|---|---|---|---|
| Text to Video | Fast ideas, metaphors, stylized scenes | Concept and vibe | Prompt stays vague | Add subject + action + place |
| Frame to Video | Specific story beats, transitions | Start and end composition | Start/end frames fight | Choose closer frames |
| Ingredient to Video | Branded compositions | What shows up in-frame | Too many ingredients | Keep only key elements |
How to write prompts that stay consistent across AI video clips
A good AI video prompt reads like a short shot note. You don’t need fancy language. You need repeatable constraints.
The Shot Note Prompt Builder
Use this structure, and keep it to 2–4 sentences.
- Subject: who or what appears
- Setting: where it happens
- Action: what changes over time
- Camera: what the camera does
Prompt examples you can reuse (by scene type)
| Scene type | When to use it | Prompt starter |
|---|---|---|
| Hook / opener | First 3 seconds | “Fast-paced montage of [theme], then land on [main subject]. Camera: quick cuts, then steady.” |
| Product proof | Show it’s real | “Close-up of [UI/product] in [environment]. Camera: steady, slight push-in. Keep text readable.” |
| Feature explanation | One clear idea | “Presenter gestures to [object] while [change] happens. Camera: medium shot, calm pace.” |
| Social-style vibe | UGC feel | “Handheld phone-style shot of [subject] in [setting]. Natural lighting, casual but clean.” |
If you want a more detailed look at prompting for AI video tools, check out our article about how to prompt Veo 3 and Veo 3.1.
Troubleshooting: fix common AI video generation problems fast
You don’t need a full redo for most issues. You usually need one smarter constraint.
- Characters change faces or outfits: switch the scene to Ingredient to Video and reuse the same character ingredient.
- Logo or UI text warps: simplify the shot, reduce motion, and keep the camera steadier. Try Frame to Video with a cleaner start and end frame.
- Background keeps drifting: repeat the environment anchor and remove extra style adjectives that fight each other.
- Too much chaotic motion: explicitly request “subtle motion” and “steady camera,” then shorten the scene.
- The clip feels off-brand: name your style and add one brand constraint, like “clean modern, minimal, no clutter.”
A practical way to generate clips without wasting time
If you want speed and control, use a simple loop:
- Storyboard first (structure)
- Generate a first pass (motion)
- Fix only the scenes that matter most (polish)
Start with the scenes your audience will remember: the hook, the product proof moment, and the final call to action. Once those land, everything else gets easier.
FAQ
Start by tightening your storyboard so each scene has one clear idea and a purpose in the flow. Then pick the scenes where motion actually helps, and generate AI video clips for those scenes first (hook, product proof, and CTA usually matter most). Choose a generation method per scene—Text to Video for fast exploration, Frame to Video for precise beats, or Ingredient to Video for branded composition. Generate a few variations, keep the best one, and only iterate on scenes that still feel off.
Use Text to Video when you want speed, concept exploration, or a stylized moment that doesn’t need strict framing. Use Frame to Video when you need a specific start and end frame, or when you want a smoother transition between two scenes. Use Ingredient to Video when you need specific elements in one shot, like a character plus a logo plus a product UI in a consistent environment. If you’re unsure, start with Text to Video to explore, then switch to Frame or Ingredient to lock the final composition.
Write prompts like shot notes: subject, setting, action, camera, then style and mood. Repeat two to three consistency anchors across scenes, such as the same character name, the same environment, and the same primary object or UI. Keep camera direction consistent within a section, like “slow push-in” or “steady tripod,” so your scenes feel like one video instead of a collage. Avoid stacking competing style words, because fewer, clearer constraints usually produce more stable AI video generation.
AI video generation tends to drift when a scene asks for too many changes at once, or when the prompt doesn’t pin down what must stay the same. If a character or logo keeps changing, generate AI video clips with Ingredient to Video and reuse the same character and brand assets as ingredients. If the motion looks warped, reduce camera movement and try Frame to Video with start and end frames that match in angle and lighting. When in doubt, simplify the scene and regenerate, because clarity beats complexity for reliable results.
Animating the full storyboard gives you a fast first pass, which works well when your storyboard already reads clean and you just need momentum. Generating AI video clips scene by scene gives you tighter control over prompts, framing, and continuity, especially for product shots and branded moments. A good hybrid is to generate everything once, then redo only the scenes that viewers will remember most. That approach keeps your workload low while still letting you polish the scenes that drive outcomes.
May Horiuchi
May is a Content Specialist and AI Expert for Visla. She is an in-house expert on anything Visla and loves testing out different AI tools to figure out which ones are actually helpful and useful for content creators, businesses, and organizations.