
Quick Answer
Video editing pacing refers to how fast or slow your video feels to a viewer, and it’s one of the biggest factors in whether someone actually watches your video all the way through. You control pacing through things like scene length, cuts, pauses, and the footage you choose. In Visla, you’ve got several straightforward tools for adjusting all of these, whether you set them before you generate your video or fine-tune them afterward in the scene-based editor.
What Is Pacing in Video Editing?
Pacing is the rhythm of your video. It’s how quickly scenes move, how long you sit on any given moment, and how all of that adds up to a feeling. A fast-paced video feels urgent and energetic. A slower one feels deliberate and calm. Neither is inherently better – what matters is whether the pacing matches what you’re trying to do.
Think about the difference between a 30-second product teaser and a 10-minute onboarding walkthrough. The teaser needs to move quickly to hold attention and build excitement. The walkthrough needs to breathe so that viewers can actually follow along and retain what they’re learning. Same platform, same team, completely different pacing needs.
Why Should I Care About Pacing in My Video?
Here’s the honest answer: pacing is the difference between a video someone watches and one they abandon 15 seconds in. Even if your content is solid, bad pacing makes it feel off. Too fast and people feel lost. Too slow and they check their phone.
Beyond viewer retention, pacing also affects how credible and professional your video looks. A well-paced video signals that whoever made it knew what they were doing, and that matters for how your audience perceives your brand.
That said, different teams care about pacing for slightly different reasons.
Marketing Teams
For marketing, pacing is a conversion tool. Fast cuts and dynamic footage create momentum that pushes a viewer toward action. But if your video is explaining something even a little complex, like a product’s key differentiators or a campaign concept, rushing through it will lose people before they get to your CTA. Getting the pacing right means more people reach the end of your video, which is where your message actually lands.
Training and L&D Teams
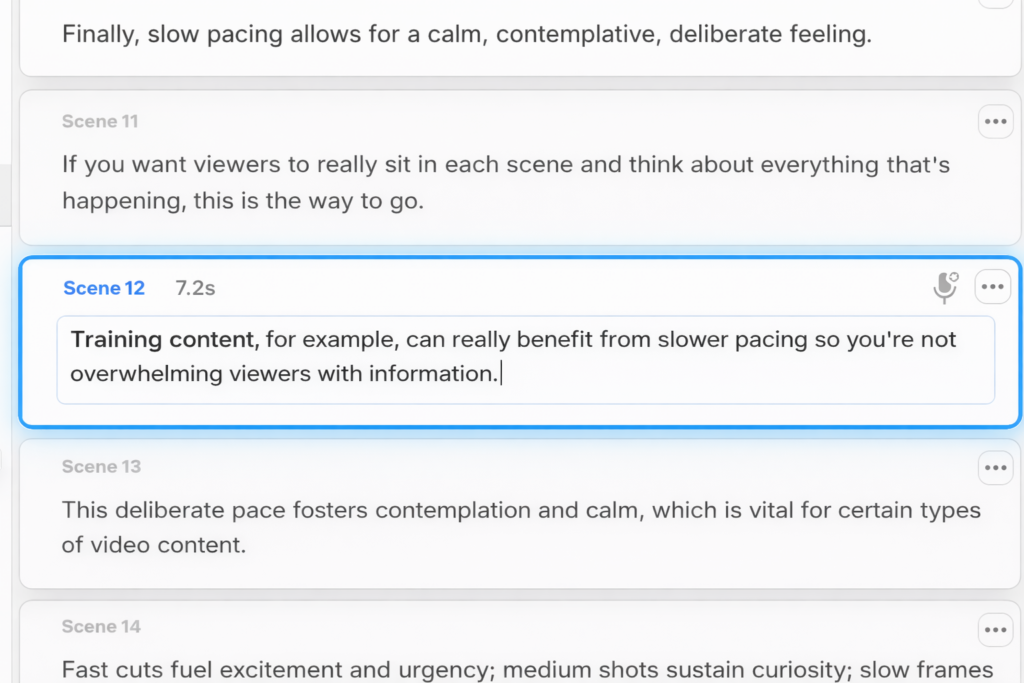
If you’re making onboarding content or instructional videos, slower pacing isn’t a weakness, it’s a feature. Learners need time to process information, especially when it’s new. A video that races through steps is just a frustrating experience for someone who’s trying to follow along. Deliberately paced training content leads to better comprehension and fewer follow-up questions.
Communications Teams
Executive updates, company announcements, internal comms need pacing that feels measured and confident. Too fast and it feels rushed or anxious. Too slow and it starts to drag. The sweet spot is a calm, even rhythm that says “we’ve got this” without putting anyone to sleep.
What Are Ways to Change the Pace of My Video?
When you’re making a video in Visla with an AI voiceover (which is the most common workflow), your pacing controls come down to a handful of practical levers. Here’s what they are and how to use them.
Pace of Cuts
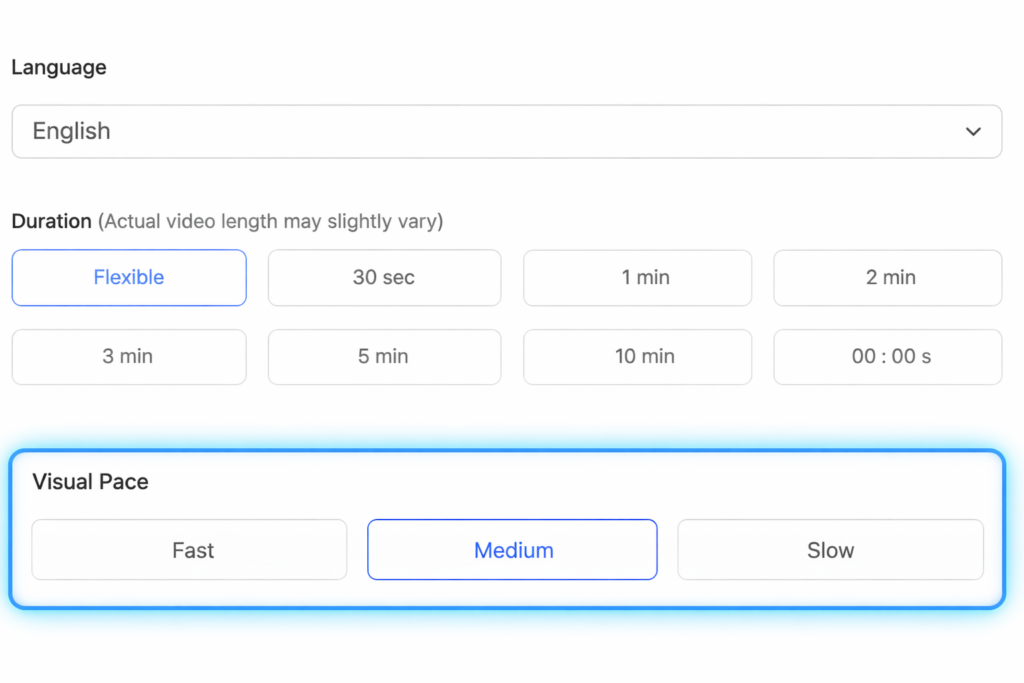
The most direct pacing control is the cut speed you set when you first generate your video. This tells Visla’s AI Video Agent how long each scene should generally run, so it’s worth thinking about your content type before you hit generate. You can always adjust from there, but setting the right pace upfront saves editing time.
- Open Visla’s AI Video Agent and start a new project.
- Enter your input: an idea, script, link, existing footage, audio, or images, or a PDF/PPT
- When prompted to configure your video, locate the pace setting.
- Choose Fast, Medium, or Slow depending on the feel you’re going for.
- Generate your video. The Agent will build your scenes with that rhythm in mind.
Adjust Scene Length by Editing the Script
Because Visla syncs your AI voiceover directly to your scenes, editing your script text is actually a pacing tool. Longer text means a longer scene; trimmer text means a tighter one. It’s one of the more intuitive controls available because it connects your content and your timing in one step.
- In the Scene-Based Editor, click on the scene you want to adjust.
- To lengthen the scene, add copy or expand an existing sentence. To shorten it, trim the text down.
- Play back the scene to confirm the new duration feels right.
Split Longer Scenes Into Smaller Ones
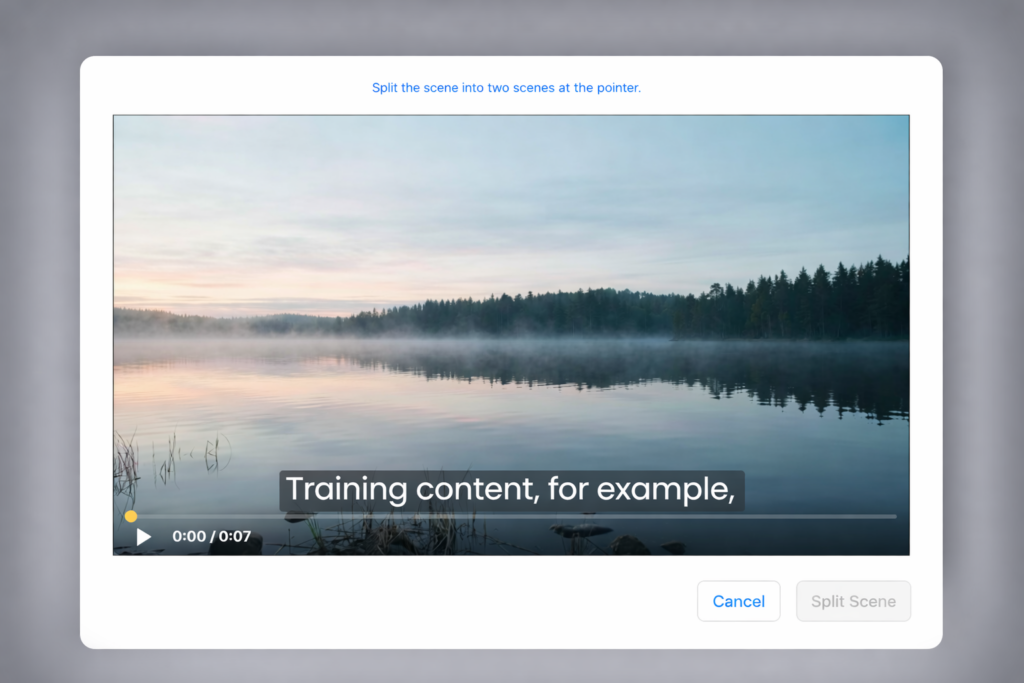
If a scene has too much happening, or the visual just stays on screen too long, splitting it up is a quick fix. Breaking one scene into two or more shorter ones adds visual variety and gives you more granular control over your video’s rhythm without touching the script.
- In the Scene-Based Editor, click on the scene you want to split.
- Click the options menu (the three-dot icon) in the upper right corner of the scene.
- Select “Split Scene” from the dropdown.
Add Pauses Between Scenes
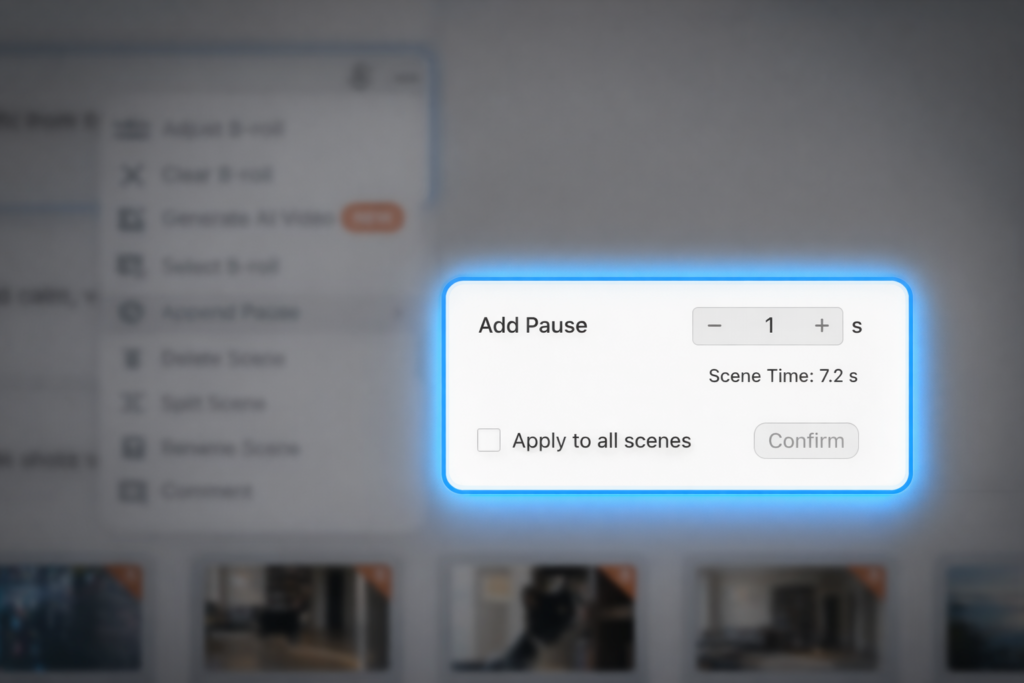
Pauses are a genuinely underused pacing tool, especially for educational or instructional content. A well-placed pause gives viewers a moment to absorb what they just heard before the next scene kicks in. You can set a pause for an individual scene or apply one consistently across your entire project.
- In the scene-based editor, click on the scene you want to add a pause after.
- Click the options menu (the three-dot icon) in the upper right corner of the scene.
- Select “Append Pause” from the dropdown.
- In the submenu that appears, enter the number of seconds you want the pause to last.
- If you want that same pause duration applied to every scene in your project, check the “Apply to All Scenes” checkbox.
- Play back the scene to confirm it feels right.
Choose Footage That Matches Your Intended Pace
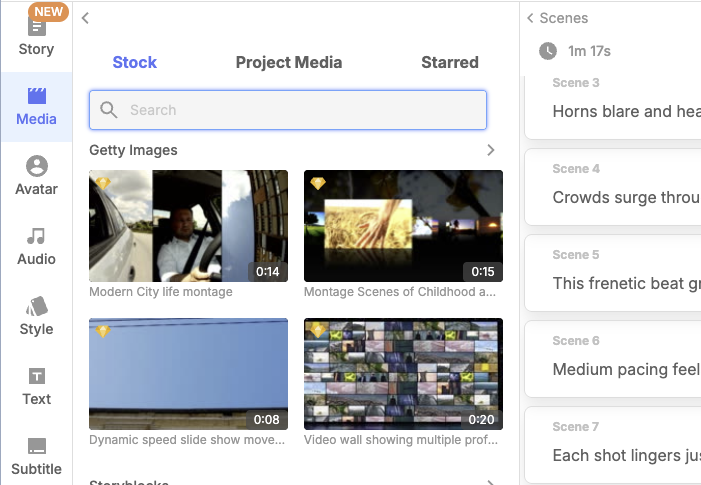
The footage itself carries a lot of pacing energy, even when everything else stays the same. Busy, fast-moving clips make a video feel urgent. Calmer footage makes it feel more grounded. In Visla, you’ve got two ways to find the right match.
Using stock footage:
- In the Scene-Based Editor, click on the scene whose footage you want to change.
- Open the footage search and enter descriptive terms that reflect the energy you want (think “fast-paced,” “dynamic,” “calm,” or “minimal”).
- Browse the results and select a clip that fits.
Using AI-generated footage:
- Review the generated options and apply the one that fits best.
- Click on the scene you want to update.
- Click the options menu (the three-dot icon) in the upper right corner of the scene.
- Click on “Generate AI Video” to generate AI footage.
- Write a prompt that describes not just the subject, but the energy you want.
FAQ
No. Faster pacing can build intensity and excitement, but YouTube’s own editing guidance notes that slower pacing can be better when you want viewers to absorb and reflect on what they’re seeing. The smarter rule is to match pace to the goal of the video, the expectations of the audience, and the energy of the footage instead of assuming that more cuts automatically means better results.
Yes. Visla’s scene-based editing lets you shorten or extend scenes, rearrange them, and cut or merge moments, while related tools let you fine-tune overlays, transitions, voiceover, music, and subtitle pacing. That means the exact same raw material can feel sharper, calmer, or more deliberate in post without rebuilding the whole video from scratch.
The best place to check is your audience-retention data after the video goes live. YouTube says dips usually mean viewers skipped ahead or left, spikes can mean people rewatched or shared a moment, and the intro metric shows how many viewers were still watching after the first 30 seconds. If your strongest moments are happening late in the video, that is often a sign that your opening pacing needs work and your most compelling material should arrive earlier.
May Horiuchi
May is a Content Specialist and AI Expert for Visla. She is an in-house expert on anything Visla and loves testing out different AI tools to figure out which ones are actually helpful and useful for content creators, businesses, and organizations.